Tuesday, October 28, 2014

Put Some South In Your Mouth!


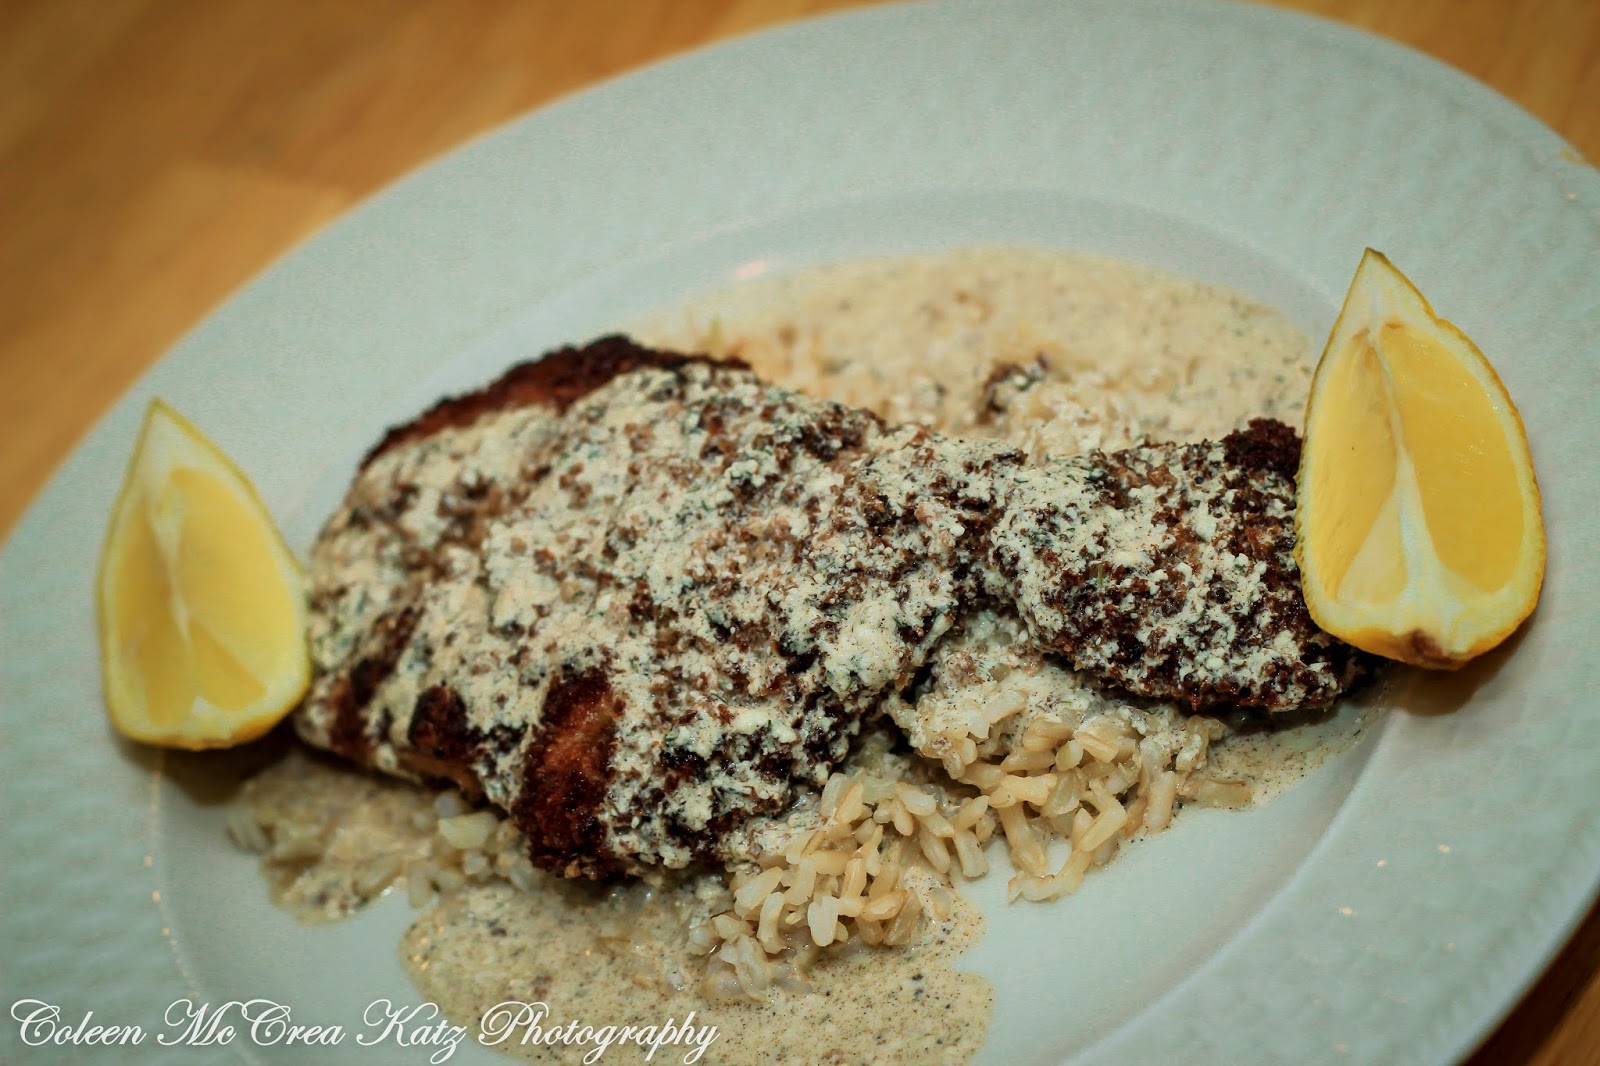
Southern Fried Chicken

Frying chicken always seemed really difficult and intimidating to me until I saw it done by a true Southern woman.  Then it just looked like the easiest thing in the world!  So I decided to try my Yankee hand at it.  And what do you know?  It was delicious!!!  The key was using some pre-mixed Southern chicken coating.  Here is how I did it:

Ingredients:
2 lbs. Boneless skinless Chicken Breasts
½ Cup All Purpose Flour
1 teaspoon Sea Salt
1 teaspoon Cracked Black Pepper
¼ Cup Milk
2 tablespoons Sour Cream
¾ Cup Louisiana Fish Fry Products Seasoned Chicken Fry
2 Cups Vegetable Oil
1 Cup Milk
¼ Cup Ranch Salad Dressing
2 tablespoons Onion & Chive Cream Cheese
1 tablespoon Corn Starch
Directions:
Pour oil in to a large skillet and begin to heat over medium-high heat. 
Slice chicken into fingers or strips.
Put flour, salt and pepper in a small mixing bowl and whisk to mix.
Put ¼ Cup of Milk and sour cream in a small mixing bowl and whisk until thoroughly mixed.
Put seasoned chicken coating in a third small mixing bowl. 
Dip each piece of chicken first into flour, then milk mixture, and lastly the seasoned chicken coating.
To test to see if the oil is hot enough to cook the chicken, insert the handle of a wood spoon in the center of the pan.  If bubbles form around the handle, the oil is hot.
Place chicken in the oil and cook turning frequently until golden brown, approximately 15 to 20 minutes. 
Remove chicken from skillet.  Drain chicken on a stack of 3 or 4 paper towels.
To make the sauce, add 1 cup of milk to a sauce pan and whisk in 2 tablespoons of Onion & Chive cream cheese and heat over medium high heat.
Whisk in ¼ cup Ranch dressing.  Continue to heat and whisk in 1 tablespoon of Corn Starch.
Whisk frequently and allow sauce to thicken.
This makes a lot of sauce, but it is so good you will want to put it on everything!!!

Serves 4.

I hope you try this recipe!  Let me know if you do and how it comes out.

Monday, October 20, 2014

Halloween Mantle Ideas, Tips and Tricks


This is my fall/autumn/Halloween mantle.  I leave the garland up from the end of summer through Thanksgiving.  Even the faux gourds in the glass containers stay until the Christmas decorations go up.  It saves a lot of juggling and it goes with all of the different things I put on there for fall, Halloween and Thanksgiving.


To "fill" the vase with Candy Corn, I learned a new trick this year.  I think it was on "The Chew", but it could have been on Pinterest.  You invert a plastic container from Chinese food (a quart size or so) in the middle of it and pour the Candy Corn down over it.  That way you don't need a dozen bags of Candy Corn to fill the vase.  It also gives a nice solid base for my battery operated tea lights.  I used three here.

I have 3 Halloween themed nutcrackers (in need of another one to balance out the mantle) that I have collected over the years.  So keep your eyes open after Halloween for some bargains on whatever strikes your fancy!  Kohl's has some cute stuff.


These shimmery metallic gourds are from Michael's and it took one bag for each of the containers.  They were a bit pricey, but you can usually get a coupon online and print it to take with you.

Sunday, October 12, 2014

Bewitching


Don't think "elegant" and "Halloween" can go together?   Well I am here to tell you they can!!!  This how I combine them in my formal dining room.


I put the "Blinged Out Boo" pumpkin I made a while back on top of one of my old silver candlesticks. The table linens are from Kohl's a few years ago, but they always have nice things available.  Simple crystal candlesticks with orange candles are an easy compliment to this and my ghosts that came from a long forgotten craft fair. 


This gorgeous witches' hat came from Good Will!  It is brand new with the tags still on it (or they were).   Hung on the side of the chair it adds a little something.


I just love how this all came together!


On my server I have several Lenox pieces that I have gotten as gifts from my sister for my birthday over the years.  My birthday is the 27th.  

See how elegant Halloween can be?  And we haven't even left the dining room!


Wednesday, October 8, 2014

October Fest!


Schnitzel

It's that time of year again!  Time for beer, pretzels and all things German! 

I decided to try my hand at Schnitzel for the very first time.  I found a few recipes online and they looked pretty good.  So I took them and tweaked them a bit and came up with one of my own.  Let me tell you, this was HUGE hit with my hubby!!!   He's not a very adventurous eater.  While he will go for some unusual things (like alligator) occasionally, he prefers to stay within his realm of things he knows.  Schnitzel was NOT in that realm!  It was a completely different taste, but it was wonderful!!!

Ingredients:
4 boneless pork chops
¼ cup all purpose flour
1 teaspoon Kosher salt
½ teaspoon fresh ground black pepper
2 large eggs beaten
¼ cup milk
2 cups Panko bread crumbs
1 teaspoon ground nutmeg
¼ cup butter
¾ cup chicken stock
1 teaspoon dry dill
½ cup sour cream

Directions:
Place pork chops between two sheets of wax paper and pound with a meat tenderizer until about 1/8 inch thick.  Trim any fat from the edges and make a few small slits around the edges to prevent the pork from curling up during cooking.

Combine flour, a pinch of salt, a pinch of pepper, and a pinch of nutmeg; whisk together in a shallow bowl.  Whisk together the eggs, milk, a pinch of salt, a pinch of pepper, and a pinch of nutmeg in a second bowl.  In a third bowl, whisk together Panko bread crumbs, a pinch of salt, a pinch of pepper, and a pinch of nutmeg.

Dredge the pork chops in the flour, dip them in the egg mixture followed by the Panko bread crumbs. 
Melt butter in a large non-stick skillet over medium-high heat.  Arrange no more than two pork chops at a time in the skillet, cook until golden brown and no longer pink inside, about 3 to 4 minutes on each side.  Remove and keep warm in the oven. 

Pour chicken stock into the skillet used to cook pork chops. Reduce heat to low and scrape up any brown bits in the bottom of the pan.  As the stock simmers, mix the dill and sour cream together in a bowl.  Whisk about ¼ of the sour cream in to the stock at a time and whisk thoroughly after each addition.

Allow sauce to simmer and reduce for about 5 minutes.  Serve over schnitzel with lemon wedges.
Serves 4.

Thursday, October 2, 2014

Baby Love

Baby Love

It's my daughter's birthday and I wanted to have the kids make something for her.  I had these letters laying around from the dollar tree that I picked up without really knowing what I was going to do with them.  The canvas came in a pack of 2 for $4.99 from Michael's.  The paint is about $3 a bottle.  And the names were written with a dollar store Sharpie.  So this is a very inexpensive gift. 


I used 2 of each letter and I put some foam double sided tape between them using two layers of the foam tape to make a cool 3D effect.


Joseph (age 31/2) was a little confused and we had to do a double imprint, but he thought it was pretty cool and learned what a hand print and a foot print are.  


Nicholas (age 5 months) was surprisingly quite cooperative.


I think their mama bear is going to love it!