Wednesday, December 17, 2014

Candy Cane Heart Ornament


This is one of the easiest crafts you can every make!!!  Two candy canes, cut out a couple of holly leaves, and get some red berries.  Some hot glue and you're done!  

The leaves are cut out of some craft foam and the "berries" are these super light beads both of which I got at the dollar store.  So, you can make several of these ornaments for about $3.

Easy 2 Ingredient Fudge!


I found this recipe on Pinterest for a 2 ingredient fudge.  It's just 3 cups of chocolate chips and 1 can of evaporated milk.  That's it!  It's delicious!!!  I am making a ton of fudge this year of different types.  Here is my first batch of Candy Cane fudge.


I also did a batch of Crushed Pretzel fudge.  


I packaged them up in these cute little tins from the Dollar Store.  Now I have some great gifts!


Tuesday, December 16, 2014

Christmas Eve Boxes 2014


It's that time of year again!  Time to make up a special gift box for the little ones to open on Christmas Eve!  

I have to say, while this may not be the biggest gift or the one that "Wows" them, it is so much fun to do!  Plus, it's one of the first gifts they will open.  My kids always loved getting this box from my mom.  My mom just did the pajamas, I stepped my boxes up a bit.  

This year we have a new addition and, while he's only 8 months old, he's getting his very first Christmas Eve Box! 

So, let's go over what I put in it this year.


This one if for my 4 year old grandson.  I decided to skip the DVD since they can't really interrupt a Christmas Eve party to watch them and I went with a coloring book instead which is a nice quiet activity that they can do by themselves.  Don't forget to put some crayons in there too!  I put in some hot chocolate and popcorn.  Of course and nice cozy pair of Christmas pajamas is always in the box.


This is the one I did for my 8 month old grandson.  This one was a bit more difficult.  I put in the pajamas, a "Baby's First Christmas" bib, and then I bagged up some of his favorite baby treats in a festive bag.  Next year it will be easier to do one for him.


Then I just put the lids and labels and tie them up with my tulle.  

Stay tuned for my video tutorials on wrapping.

Thursday, December 11, 2014

Snowman Tealights


I made the ones  on the top right last year and decided to try them again this year with my grandson. The twist this year was I used glue dots since my 4 year old grandson very much wanted to do it all by himself!!!  Therefore, the hot glue was not going to work!


So we used a tea light, a finger cut off of a glove, a few glue dots, and a Sharpie.  


The one on the far right is the one with the glue dots.  Can you tell the difference?


Really cute!


Wednesday, December 3, 2014

Christmas Pictures


So, you have a "good camera" and you think you can take photos like the ones above.  Maybe you can.  But it's not easy!  I have been working on this for years and I continue to get better at it all the time.  

First things first, you need to learn how to use your camera.  Confession, I still don't know mine well enough despite having taken several classes.  For whatever reason, when there are classes on DSLR cameras, they are almost always on Nikons, not Canons.  I have a Canon.  So I end up taking a class that doesn't apply to my camera.  I did take one really good class, but that isn't really enough.  I am still in need of more training. It's a process.  

Second, you will need a post production program of some type.  I use more than one.  I use Lightroom and Picmonkey.  They each do different things in an easier way for me.  Both are user friendly.  I have a lot of Presets on Lightroom that I either designed myself or bought or got for free.  I like Picmonkey for the airbrushing and other touch up techniques you can use.  Even the babies need these.  I whiten the eyes, add a little color to the eyes, cheeks, etc.  Maybe you need to get rid of some stray hairs, whatever.  

Now we can talk about the set up for the photos.


This prop is probably the cheapest one I have and it is one of the biggest ones both in size and impact.  I saved a large box from UPS and I got 4 rolls of wrapping paper and 2 packs of tissue paper (but only used 1) from the Dollar Tree.  I put a few pillows inside and there you have it!  Baby in a box!!!


Simply putting the boys in matching outfits sets the stage for a good photo.  The fact that it coordinated with the paper on the box also added to the effect.  


The back drop is one continuous run of white fleece I bought a few years ago.  I think it's about 10 yards.  I clipped it up on my frame that holds my back drops.  The snowflakes are from the Dollar Tree.  


Shooting little ones is a lot like herding cats!  It's organized chaos!!  I kept giving instructions and shooting.  "Hug your brother!"  "Peek over his shoulder!"  Stuff like that.  This was something I didn't see until I started post production.  So sweet!  


These are some plastic candy canes I got at Michael's.  They make a nice graphic addition on the white background.  For this shot I was on a step stool.

I hope these tips help you to get professional looking shots of your little (or big) ones.


Wednesday, November 26, 2014

Christmas Gifts to Make


No Sew Wrap

This is one of the easiest things you can make.  Absolutely NO SEWING!!!  ZERO!  All you need are some pins, scissors, and a tape measure.  Here's how to make it:
Use 1 1/2 yards of fleece.  Fold it in half lengthwise.  Place a pin halfway up the length on the folded edge.  Cut along the fold up to the pin.  On both of the short ends, cut 2 inch long fringes. And that's it!  

Quick and Easy Cell Phone Pocket Scarf


This one takes just a little bit of sewing that can easily be done by hand.  Cut a 36 by 8 inch piece of fleece.  Cut 1 1/2 inch fringes on the short ends of the fleece. Cut 6 inch squares of fleece in a coordinating fabric.  Stitch them on three sides leaving the side that is away from the fringes open.  No need to fold a hem on the pockets, fleece does not fray.   

Fleece Mitten Ornaments


This one is a little more difficult.  I used a pattern.  I printed out a mitten shape on my printer a little larger than what I wanted my ornaments to be then I cut 4 of the shapes, stitched them on all but the cuff sides and stuffed them.  Then I hand stitched the cuff sides with the ribbon inside that seam.  Then I tied the ribbons together to form the hanger. 


Wednesday, November 19, 2014

Scentsational!


This has to be the best tip I could ever give you!  This is a two-fer!  It's a way to get those pesky inserts out of your magazines and mailings and put them to good use.

I hate the extra thick pages in magazine that have perfume samples on them.  They make the magazine open oddly and make it difficult to read.   You can also find these inserts in mailings from department store, even in your bills at times!  

Well, I found a way to put them to good use!  I tear them out, tear off the strips with the scent on them, open them up, and put them in my drawers!!!  That way, I have some very expensive perfumes scenting my clothing!!!  

It's quite delightful to open your drawers and smell Chanel!  It's heaven to put on your pajamas and have that scent as you sleep!!!  If you have some sweaters that you are just taking out for the first time of the season, this is a way to make them fresh.  

As the strips in your drawers lose their scent, there is always a new batch arriving in your mailbox!

Wednesday, November 12, 2014

Mesh Turkey

Mesh Turkey


I am on a mission to use up many of the left over bits and pieces that I have laying around my house before I go out and buy things.  I mean, my craft room is getting over run with scraps and pieces of things from prior projects.

I really wanted something turkey related for my front door.  I knew I had some mesh left over from some Halloween wreaths I had made.  I also knew I had a few other things, but I wasn't quite sure what.  

Here is what I found:


I decided that the cornucopia would make a great body for a turkey, the sparkly thing could be the wattle, I was going to figure out how to use one of the gourds for the head, the mesh for the feathers, okay I am getting a good concept going.  It was all trial and error from there. 


I cut off the top of one gourd and hallowed it out to fit on the top of the cornucopia.  I used a sharpie to draw on the eyes and beak.  I glued on the wattle and covered up the messiness with a piece of the ribbon.  I had to stuff the cornucopia with some mesh and a few of the gourds to balance the weight.  


I wired the mesh pieces through the wicker and I also wrapped a piece of twine around the cornucopia and wired that through the wicker to make a loop to hang it.  


I have no idea where these sparkly berries came from, but they are the perfect wattle!  


I made feet out of pipe cleaners and hot glued those to the bottom.

All in all, I think it's a unique and pretty cool addition to our Thanksgiving decor!  It's a bit wide for the space between the front door and storm door, but it's fairly malleable so it just kind squishes to fit.  


Friday, November 7, 2014

Wrap It Up!


It's that time of year again!  The time when you need to wrap a million gifts all at once!  Or do you?  

I have a trick to get it all done once and for all.  Then you can just reuse the boxes year after year!!!  

So here we go!!!

First, you need to collect a lot of boxes!!!


As you can see, I save anything.  Shoe boxes, shirt boxes, you name it.  Because you just don't know what you will be buying for gifts and you will most likely use every single box size and shape.  Also, they will be wrapped, so what they look like isn't important.

The next step is to collect lots of gift wrap, I get mine from dollar stores.

Then it's time to wrap.  The important thing here is to use Scotch Magic tape!  If you use inexpensive tape, it's going to be a disaster!!!  Be sure to get Scotch Magic tape.

For boxes where the bottoms are white or have no logos on them, you can just wrap the lid.  If the bottom has a logo or something else undesirable, wrap the bottom too.  Either way, this is the way both pieces should be wrapped:


You fold and wrap everything to the inside of the lid or bottom and use a lot of Scotch Magic tape to hold it all in place.  


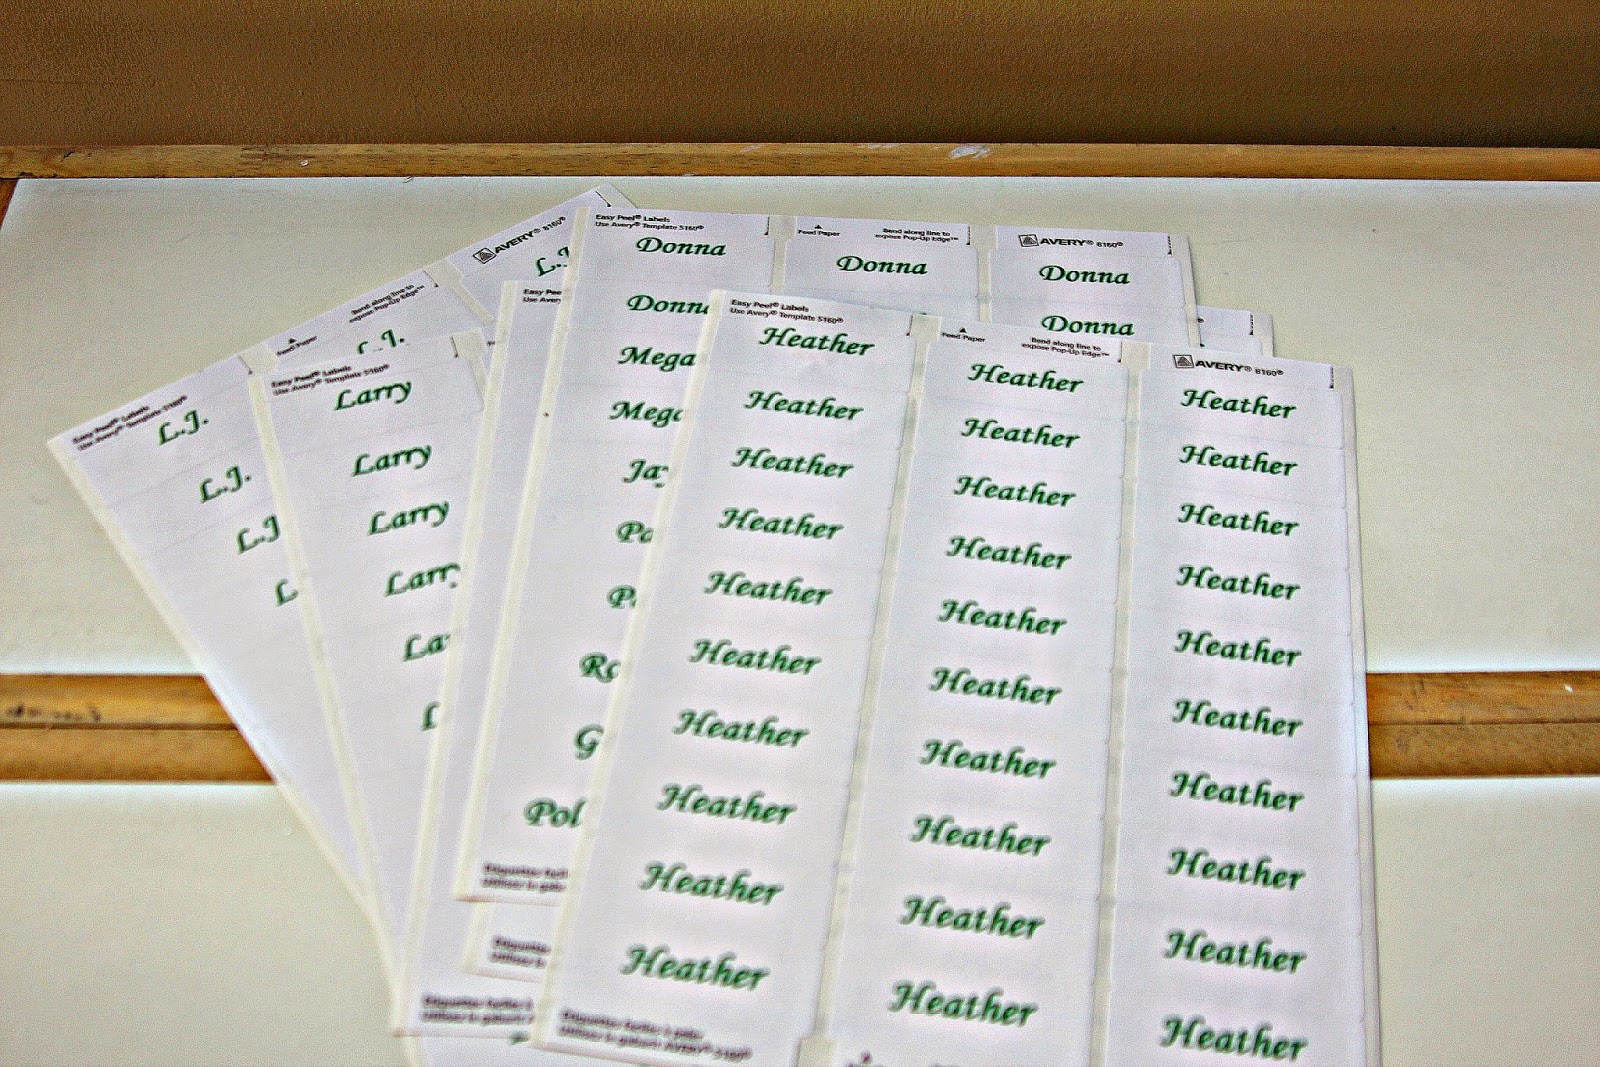
Next, print out some removable labels with the names of all your family members.  I do a sheet for each person.  


That way, when you reuse the boxes next year, you can change the labels.  


After that I just add my signature tulle bow and I am done.  The following year it's just a matter of grabbing a box, making sure there is tissue paper in it, putting a label on it, and putting a new bow on it.  

Time to get wrapping!!!  


Tuesday, October 28, 2014

Put Some South In Your Mouth!


Southern Fried Chicken

Frying chicken always seemed really difficult and intimidating to me until I saw it done by a true Southern woman.  Then it just looked like the easiest thing in the world!  So I decided to try my Yankee hand at it.  And what do you know?  It was delicious!!!  The key was using some pre-mixed Southern chicken coating.  Here is how I did it:

Ingredients:
2 lbs. Boneless skinless Chicken Breasts
½ Cup All Purpose Flour
1 teaspoon Sea Salt
1 teaspoon Cracked Black Pepper
¼ Cup Milk
2 tablespoons Sour Cream
¾ Cup Louisiana Fish Fry Products Seasoned Chicken Fry
2 Cups Vegetable Oil
1 Cup Milk
¼ Cup Ranch Salad Dressing
2 tablespoons Onion & Chive Cream Cheese
1 tablespoon Corn Starch
Directions:
Pour oil in to a large skillet and begin to heat over medium-high heat. 
Slice chicken into fingers or strips.
Put flour, salt and pepper in a small mixing bowl and whisk to mix.
Put ¼ Cup of Milk and sour cream in a small mixing bowl and whisk until thoroughly mixed.
Put seasoned chicken coating in a third small mixing bowl. 
Dip each piece of chicken first into flour, then milk mixture, and lastly the seasoned chicken coating.
To test to see if the oil is hot enough to cook the chicken, insert the handle of a wood spoon in the center of the pan.  If bubbles form around the handle, the oil is hot.
Place chicken in the oil and cook turning frequently until golden brown, approximately 15 to 20 minutes. 
Remove chicken from skillet.  Drain chicken on a stack of 3 or 4 paper towels.
To make the sauce, add 1 cup of milk to a sauce pan and whisk in 2 tablespoons of Onion & Chive cream cheese and heat over medium high heat.
Whisk in ¼ cup Ranch dressing.  Continue to heat and whisk in 1 tablespoon of Corn Starch.
Whisk frequently and allow sauce to thicken.
This makes a lot of sauce, but it is so good you will want to put it on everything!!!

Serves 4.

I hope you try this recipe!  Let me know if you do and how it comes out.

Monday, October 20, 2014

Halloween Mantle Ideas, Tips and Tricks


This is my fall/autumn/Halloween mantle.  I leave the garland up from the end of summer through Thanksgiving.  Even the faux gourds in the glass containers stay until the Christmas decorations go up.  It saves a lot of juggling and it goes with all of the different things I put on there for fall, Halloween and Thanksgiving.


To "fill" the vase with Candy Corn, I learned a new trick this year.  I think it was on "The Chew", but it could have been on Pinterest.  You invert a plastic container from Chinese food (a quart size or so) in the middle of it and pour the Candy Corn down over it.  That way you don't need a dozen bags of Candy Corn to fill the vase.  It also gives a nice solid base for my battery operated tea lights.  I used three here.

I have 3 Halloween themed nutcrackers (in need of another one to balance out the mantle) that I have collected over the years.  So keep your eyes open after Halloween for some bargains on whatever strikes your fancy!  Kohl's has some cute stuff.


These shimmery metallic gourds are from Michael's and it took one bag for each of the containers.  They were a bit pricey, but you can usually get a coupon online and print it to take with you.

Sunday, October 12, 2014

Bewitching


Don't think "elegant" and "Halloween" can go together?   Well I am here to tell you they can!!!  This how I combine them in my formal dining room.


I put the "Blinged Out Boo" pumpkin I made a while back on top of one of my old silver candlesticks. The table linens are from Kohl's a few years ago, but they always have nice things available.  Simple crystal candlesticks with orange candles are an easy compliment to this and my ghosts that came from a long forgotten craft fair. 


This gorgeous witches' hat came from Good Will!  It is brand new with the tags still on it (or they were).   Hung on the side of the chair it adds a little something.


I just love how this all came together!


On my server I have several Lenox pieces that I have gotten as gifts from my sister for my birthday over the years.  My birthday is the 27th.  

See how elegant Halloween can be?  And we haven't even left the dining room!


Wednesday, October 8, 2014

October Fest!


Schnitzel

It's that time of year again!  Time for beer, pretzels and all things German! 

I decided to try my hand at Schnitzel for the very first time.  I found a few recipes online and they looked pretty good.  So I took them and tweaked them a bit and came up with one of my own.  Let me tell you, this was HUGE hit with my hubby!!!   He's not a very adventurous eater.  While he will go for some unusual things (like alligator) occasionally, he prefers to stay within his realm of things he knows.  Schnitzel was NOT in that realm!  It was a completely different taste, but it was wonderful!!!

Ingredients:
4 boneless pork chops
¼ cup all purpose flour
1 teaspoon Kosher salt
½ teaspoon fresh ground black pepper
2 large eggs beaten
¼ cup milk
2 cups Panko bread crumbs
1 teaspoon ground nutmeg
¼ cup butter
¾ cup chicken stock
1 teaspoon dry dill
½ cup sour cream

Directions:
Place pork chops between two sheets of wax paper and pound with a meat tenderizer until about 1/8 inch thick.  Trim any fat from the edges and make a few small slits around the edges to prevent the pork from curling up during cooking.

Combine flour, a pinch of salt, a pinch of pepper, and a pinch of nutmeg; whisk together in a shallow bowl.  Whisk together the eggs, milk, a pinch of salt, a pinch of pepper, and a pinch of nutmeg in a second bowl.  In a third bowl, whisk together Panko bread crumbs, a pinch of salt, a pinch of pepper, and a pinch of nutmeg.

Dredge the pork chops in the flour, dip them in the egg mixture followed by the Panko bread crumbs. 
Melt butter in a large non-stick skillet over medium-high heat.  Arrange no more than two pork chops at a time in the skillet, cook until golden brown and no longer pink inside, about 3 to 4 minutes on each side.  Remove and keep warm in the oven. 

Pour chicken stock into the skillet used to cook pork chops. Reduce heat to low and scrape up any brown bits in the bottom of the pan.  As the stock simmers, mix the dill and sour cream together in a bowl.  Whisk about ¼ of the sour cream in to the stock at a time and whisk thoroughly after each addition.

Allow sauce to simmer and reduce for about 5 minutes.  Serve over schnitzel with lemon wedges.
Serves 4.

Thursday, October 2, 2014

Baby Love

Baby Love

It's my daughter's birthday and I wanted to have the kids make something for her.  I had these letters laying around from the dollar tree that I picked up without really knowing what I was going to do with them.  The canvas came in a pack of 2 for $4.99 from Michael's.  The paint is about $3 a bottle.  And the names were written with a dollar store Sharpie.  So this is a very inexpensive gift. 


I used 2 of each letter and I put some foam double sided tape between them using two layers of the foam tape to make a cool 3D effect.


Joseph (age 31/2) was a little confused and we had to do a double imprint, but he thought it was pretty cool and learned what a hand print and a foot print are.  


Nicholas (age 5 months) was surprisingly quite cooperative.


I think their mama bear is going to love it!